Database Connections
This section describes how to use the DB Server Explorer in the SnapDevelop IDE to manage database connections and query data, such as viewing data in the database, creating and executing SQL statements, and creating models from database tables.
Appendix D: Database Connection Settings at the end of this tutorial lists the databases supported by this feature and related connection settings.
Manage database connections
Create a database connection
To perform database query operations, you first need to establish a database connection.
To create a database connection:
Step 1: Select View on the top menu bar, then select DB Server Explorer.

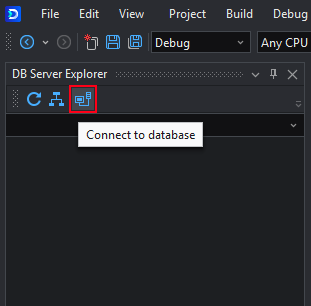
Step 2: In DB Server Explorer, click the Connect to database icon.
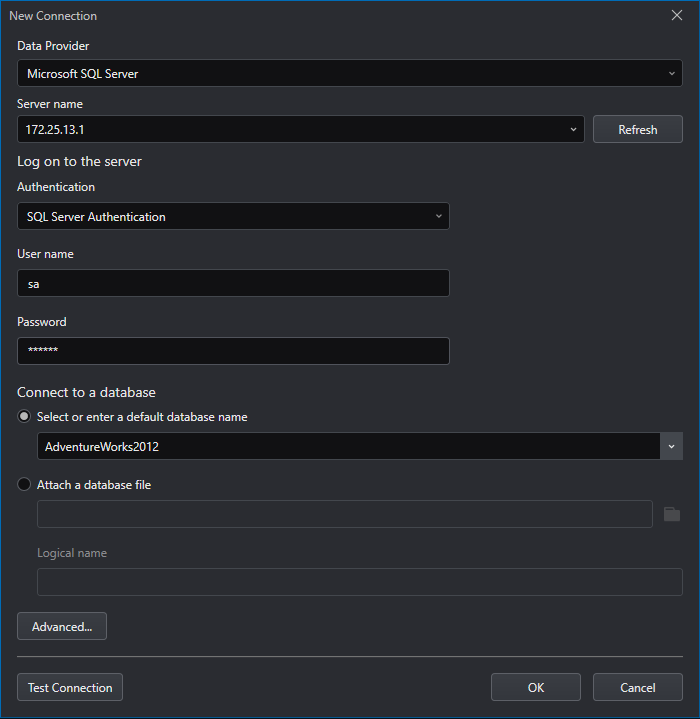
Step 3: In the New Connection dialog that opens, select a database type from the Data Provider drop-down list, and configure the database connection information for that database type.
The connection information varies by database type. For details, please refer to Appendix D: Database Connection Settings.
Step 4: After entering the connection information, click Test Connection to check the connection status. If the connection is successful, click OK to save the database connection.
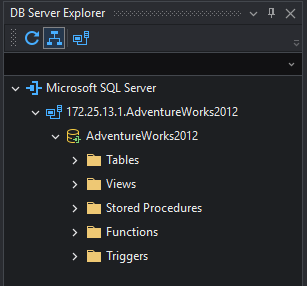
Step 5: The database connection will appear in the DB Server Explorer.
You can now access database objects (including tables, views, stored procedures, functions, and triggers) in this database.
Change the database connection
After a database connection is successfully created, you can refresh, delete, and modify the database connection by right-clicking the database connection and selecting the appropriate menu.
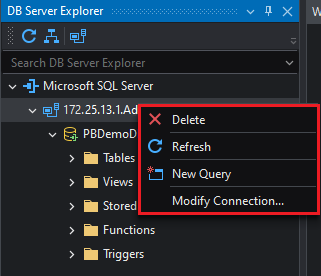
Delete -- If you want to delete a database connection, you can right-click the database connection and select Delete.
Refresh -- After a database connection is successfully created, some modifications to the database may be made. In this case, you can choose Refresh to update the database.
New Query -- If the common SQL query statements provided above cannot meet your needs, you can right-click the database connection and select New Query to enter the SQL statement you want to query in the SQL query editor.
Modify Connection -- If you want to modify some database connection properties, you can right-click the database connection and select Modify Connection. The Edit Connection page will open.
Working on database objects
After a database connection is successfully created, you can work on the database objects (including tables, views, stored procedures, functions, and triggers) in the database in the DB Server Explorer. You can right-click an object and manipulate it through the popup menu. For example, when right-clicking a table object, you can use the following context menu.
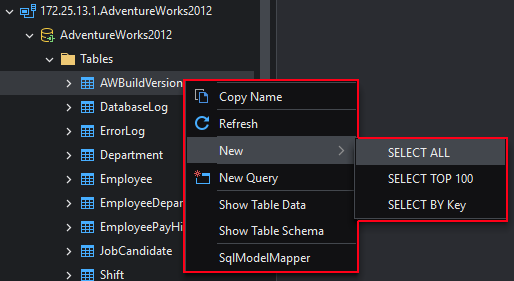
Copy Name -- Copies the name of the selected object into the clipboard, for example: [dbo].[AWBuildVersion]. This saves you from manually entering names when writing the SQL queries.
Refresh -- If modifications have been made to only one object in the database, you can refresh that object to see the modifications without having to refresh the entire database. Of course, you can also choose to refresh all table objects (or views, stored procedures, functions, triggers), or the entire database.
New -- Query data. The following three common queries are provided by default: Select all, Select top 100, and Select by key. Please refer to the next section for details.
New Query -- Writes the SQL query statement. Please refer to the next section for details.
Show Table Data -- Views all data (columns and rows) in the table.
Show Table Schema -- Views the table schema.
SqlModelMapper -- Opens a window to generate the SqlModelMapper model. After configuration, click OK to generate the SqlModelMapper model according to the table.
Common SQL queries
Right-click a table or view in the database tree view, and then select New, you can choose the following three common SQL queries: Select all, Select top 100, Select by key.
Select All -- The corresponding SQL statement will be automatically generated in the SQL query editor. Clicking the Execute icon in the SQL query editor will query and return all data in the currently selected table or view. The following is an example of the generated SQL statement:
SELECT * FROM [humanresources].[employee];Select Top 100 -- The corresponding SQL statement will be automatically generated in the SQL query editor. Clicking the Execute icon in the SQL query editor will query and return the first 100 rows of data in the currently selected table or view. The following is an example of the generated SQL statement:
SELECT TOP 100 * FROM [humanresources].[employee];Select by Key -- The corresponding SQL statement will be automatically generated in the SQL query editor. Clicking the Execute icon in the SQL query editor will query and return the data row in the current table or view according to the specified primary key value. The following is an example of the generated SQL statement:
SELECT * FROM [humanresources].[employee] WHERE businessentityid = 1;
You can modify, add, or remove these SQL statements in the SQL query editor.
New SQL query
If the common SQL query statements provided above cannot meet your needs, you can write your own SQL query statements.
Right-click a table or view in the database tree view, and then select New Query. Enter the SQL statement you want to query in the SQL query editor.
Or select New, then select a query to automatically generate the SQL statement and then modify the statement.
View Results
Clicking the Execute icon will execute all SQL statements in the SQL query editor in sequence.

If you only need to execute one of the SQL statements, select it with the mouse, and then click the Execute icon.

The execution result of the SQL statement will be displayed at the bottom of the editor. You can choose to display the SQL query execution results in different formats, split the result panel, view query messages, and more.
You can choose to display the query result in grid, text and file formats.

Output results as Grid
Displays query results in grid format, which is the default format.
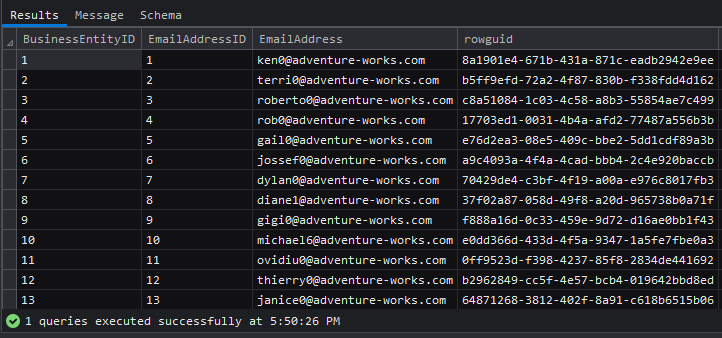
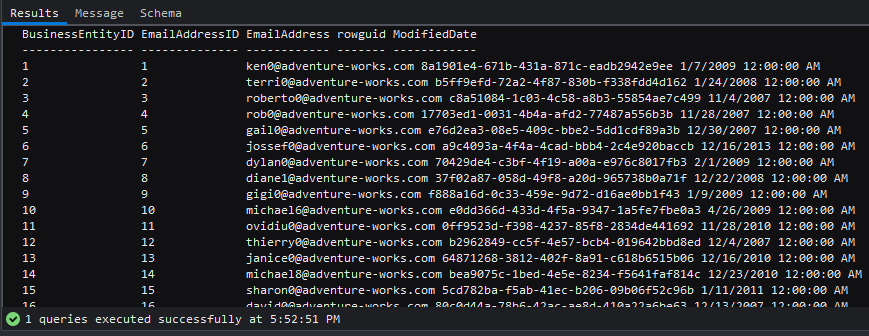
Output results as Text
Displays query results in text format.
Output results as File
Displays query results in file format. If you choose to display query results this way, you will be prompted to save the results to a file.
Split the result panel
If the SQL query contains multiple SQL statements, you can split the results panel into left and right columns so that the query results can be displayed horizontally side by side. As shown in the figure below, enable the Split the result panel into two (left and right) option, and then click the Execute icon, the query results will be displayed horizontally side by side as two columns on the left and right (instead of being displayed vertically).

View message
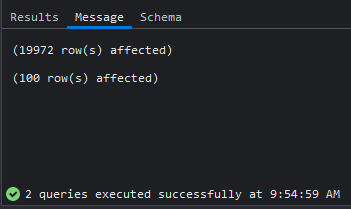
After the SQL statement is executed, a message is displayed in the Messages tab, showing the status of the query execution.
View data schema
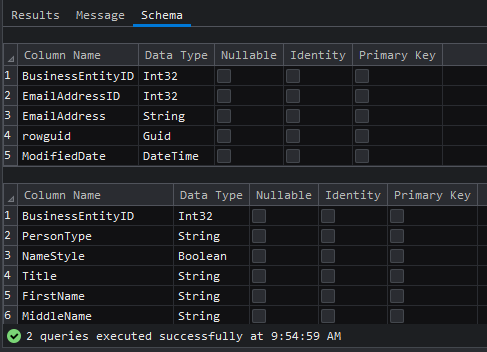
You can view the collection of relational schemas (schema) for the tables involved in the SQL statement in the Data Schema tab.
