How-to Guides
Create and design an entity
You can create an entity from scratch or from an existing database table.
To create an entity from scratch, you can use the "Entity Design (from Scratch)" item.
And then you can create the database table based on the entity. Each entity will be created as one table. The field settings will be used to create the table schema.
To create an entity from an existing database table, you can use the “Entity Design (from Database)” item.
And then you can modify the entity and create a new database or migrate the changes to the existing database.
Be aware of the following when creating and designing an entity:
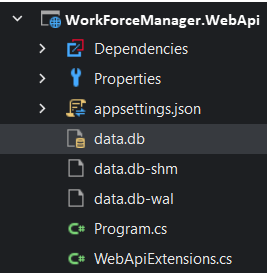
The database is created after you generate projects and then run the Web APIs project. By default the SQLite database (the database file data.db) will be created under the [project].WebApi project.
Once the database is created, if you want to make changes to the entity (including adding/deleting/modifying the field or deleting entities), database conflicts may occur and data operations may fail. You will need to manually delete or migrate the database by following instructions in Updating the database after entity changes.
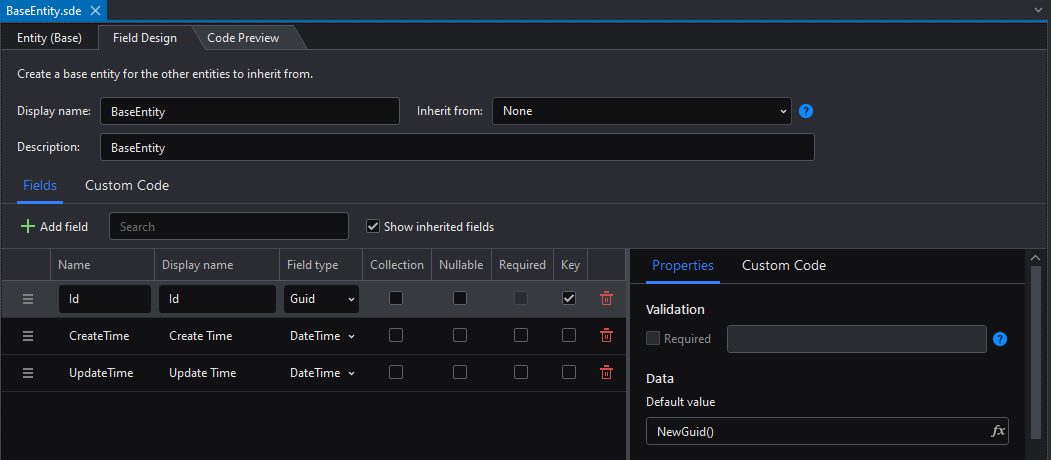
For example, to add a base entity:
Step 1: Right click the design project node and select Add > New Item. In the Add New Item dialog, select Base Entity Design, specify the entity name and then click Create.
Step 2: In the entity designer, click Add field to add and specify the field settings.
The base entity can contain the fields that are used by the other entities.
| Field Name | Field Type | Field settings |
|---|---|---|
| ID | Int32 | Key: selected |
| InsertTime | Compute | Expression: UtcNow() Data type: DateTime Execute on insert: selected |
| UpdateTime | Compute | Expression: UtcNow() Data type: DateTime Execute on insert: selected Execute on update: selected |
Step 4: You can have a closer look at these settings in the BaseEntity.sde file in the demo.

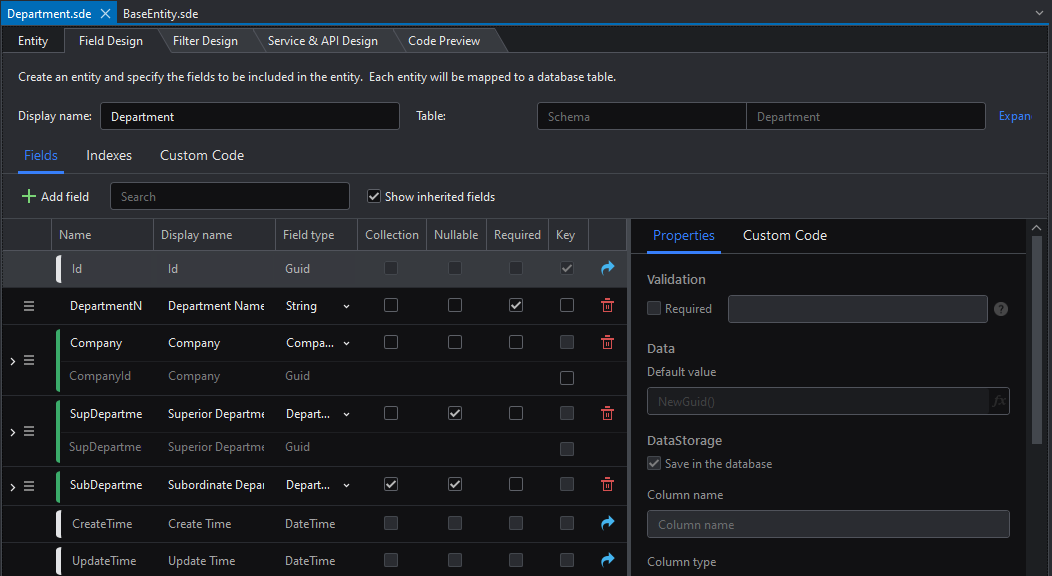
For another example, to add an entity (and inherit fields from the base entity):
Step 1: Right click the design project node and select Add > New Item. In the Add New Item dialog, select Entity Design (from Scratch), specify the entity name (for example, "Department") and then click Create.
Step 2: In the entity designer, select to inherit from the base entity, and select the Show inherited fields option so that the fields in the base entity will display as read-only at the end of the field list.
Step 3: Click Add field to add and specify the field settings.
| Field Name | Field Type | Field settings |
|---|---|---|
| DepartmentName | String | Required: selected |
| SuperiorDepartment | Department | Nullable: selected |
| Employees | Employee | Collection: selected Nullable: selected Mapped to: Employee.company |
Step 4: In the Service & API Design tab, click Add base services and Generate all APIs to generate all basic APIs.
Step 5: You can have a closer look at these settings in the Department.sde or Employee.sde file in the demo.

Generate database from entities
Once the entities are created, you can generate a database automatically from these entities.
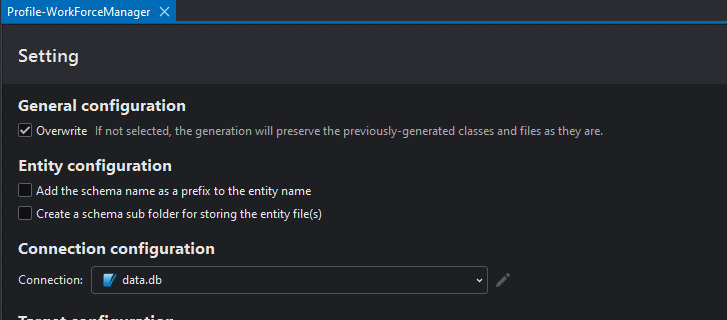
Step 1: After creating the entities in the design project, right click the design project node and select Generate Projects > Profile.
By default, a local SQLite database (data.db) will be created in the root folder of [project].WebApi.
You can also create or select a different database connection in the Profile wizard.

Step 3: Select an existing database connection or select New to create a new database connection.
Step 4: Save the profile and then click Generate Projects to generate the projects.
When project generation is successful, the generated projects will be displayed.
Step 5: In the IDE toolbar, select [project].WebApi from the project list and then click Run to start the Web APIs.

Once the Web APIs start successfully, the database file is automatically generated.
For example, by default a SQLite database (data.db) is automatically generated under the root folder of [project].WebApi. For more information, refer to Managing and updating database connections.

Generate entities from databases
See this section.
Add or modify a field in the entity
Once the database file is generated (for example, after generating and running the Web APIs and front-end application), adding/deleting/modifying fields in the existing entities may cause database conflicts (hence data operations will fail). In such cases, you will need to manually delete or migrate the database by following instructions in Updating the database after entity changes.
If you modify the following field settings in the entity, you will need to manually delete or migrate the database, in order to include these changes in the database schema.
- Field Name
- Field Type
- Collection
- Nullable
- Key
- Column name
- Column type
- Set concurrency check
- Index
- Index > Unique
Add a search field (using filter designer)
To add a search field to the application:
Step 1: Open the entity file in the designer. (Let's use the WeatherForecast template and open the WeatherForecast.sde file directly)
Step 2: Select the Filter Design tab, then click Add filter, and then specify the options for the filter.
For example, if you want to add a search field which allows users to input a date and search for the temperature for the input date, then you should specify the settings like below.
(The Date parameter and the WeatherForecast.DateTime field must match by type. For example, if you set the Date parameter to DateOnly, the WeatherForecast.DateTime field must also be set to DateOnly.)

Step 3: Select the Service & API Design tab, and then select Add service > Get paged data > With SearchByDate.
Step 4: Make sure the Generate API option is selected.

Step 5: Generate projects and run the Web APIs.
Modify the generated projects
It is not recommended to modify the generated projects directly, because these projects are generated automatically each time when Generate Project is executed. If you directly make changes to the files that are automatically generated, the changes will be overwritten next time when the projects are generated again.
If you want to add your own scripts to the generated projects, you can consider the following options:
- Add custom codes.
- Create a new project and put your scripts in the new project and make references between this new project and the auto-generated projects.
- Create a new class file in the generated project and put your scripts in the new class file.
Use the inheritance strategy
There are three inheritance strategies to choose from: TPH has better query performance, TPT has higher storage efficiency, and TPC is suitable for situations where multi-table association or query is not required (where base classes are never or rarely queried).

To use the inheritance strategy, you need to create a parent entity (not the Base Entity type), and a child entity.
Take TPH as an example:
Create an entity named TPHBase, and then select the TPH inheritance strategy.

Create an entity named TPH and select TPHBase as the base entity.
