Code First Development Tutorials
The following tutorials demonstrate the code first approach. For tutorials using the database first approach, see DB First Development Tutorials.
Creating a weather forecast sample
We will walk you through the general process of creating a designer-developed project using the WeatherForecast template project.
In this demo, we will choose the "Web API" project type. This project type will generate back-end C# Web APIs only.
This project by default contains one entity, and provides APIs for adding/getting/editing/removing and filtering temperature data. You can directly generate and run C# projects without needing to modify this template project.
Step 1: Create a design project.
From File > New > New Project, select the Designer-developed tab; and then select Web API and click Next.
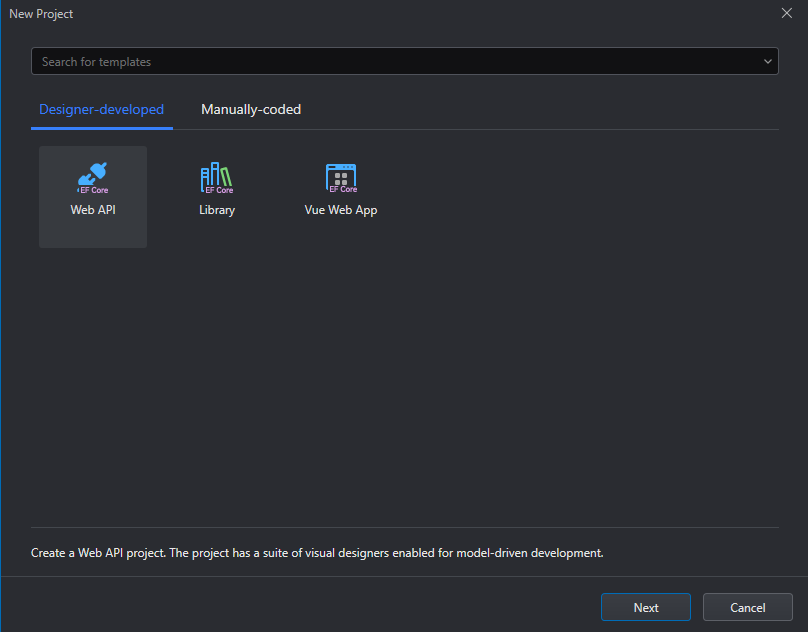
Keep the default settings and click Create.
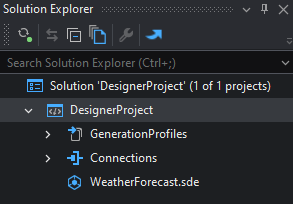
The project displays in the solution explorer.
The project contains an entity design file WeatherForecast.sde which has the basic configurations.
Step 2 (Optional): Check and/or modify the WeatherForecast.sde entity.
You can double click the WeatherForecast.sde file to load and modify the entity settings in the Entity Designer.
The Entity Designer contains 4 tabs: Field Design, Filter Design, Service & API Design, and Code Preview. The Field Design tab contains the settings for fields; the Filter Design tab contains the settings for data filters and conditions; the Service & API Design tab specifies the APIs to be generated; the Code Preview tab allows you to view the automatically generated C# code in different modes (by category or by target).
Step 3: Generate projects from the design project.
Click the Generate Projects: Profile button on the IDE toolbar, or right click the project node, and then select Generate Projects > Profile.
When the project generation is successful, the following projects are generated based on the design project.
- [project].Common: the development toolkits and extension functions that are referenced or dependent by the Contracts or Identity projects.
- [project].Contracts: the contract layer which defines the contract for the service.
- [project].Controllers: the controller layer which defines the controller for the service.
- [project].Dal: the data access layer such as EF Core which contain the database-related configurations (repository, unit of work, DbContext) and data initialization (value comparers, value converters).
- [project].Services: the service layer which implements the contracts.
- [project].WebApi: the representation layer which sends data to users.
- [project].Identity: the authentication service layer which authorizes the user registration and login internally. This project will be generated only when you enable the authorization.
Step 4: Run the projects.
Run the [project].WebApi project to start the Web APIs.

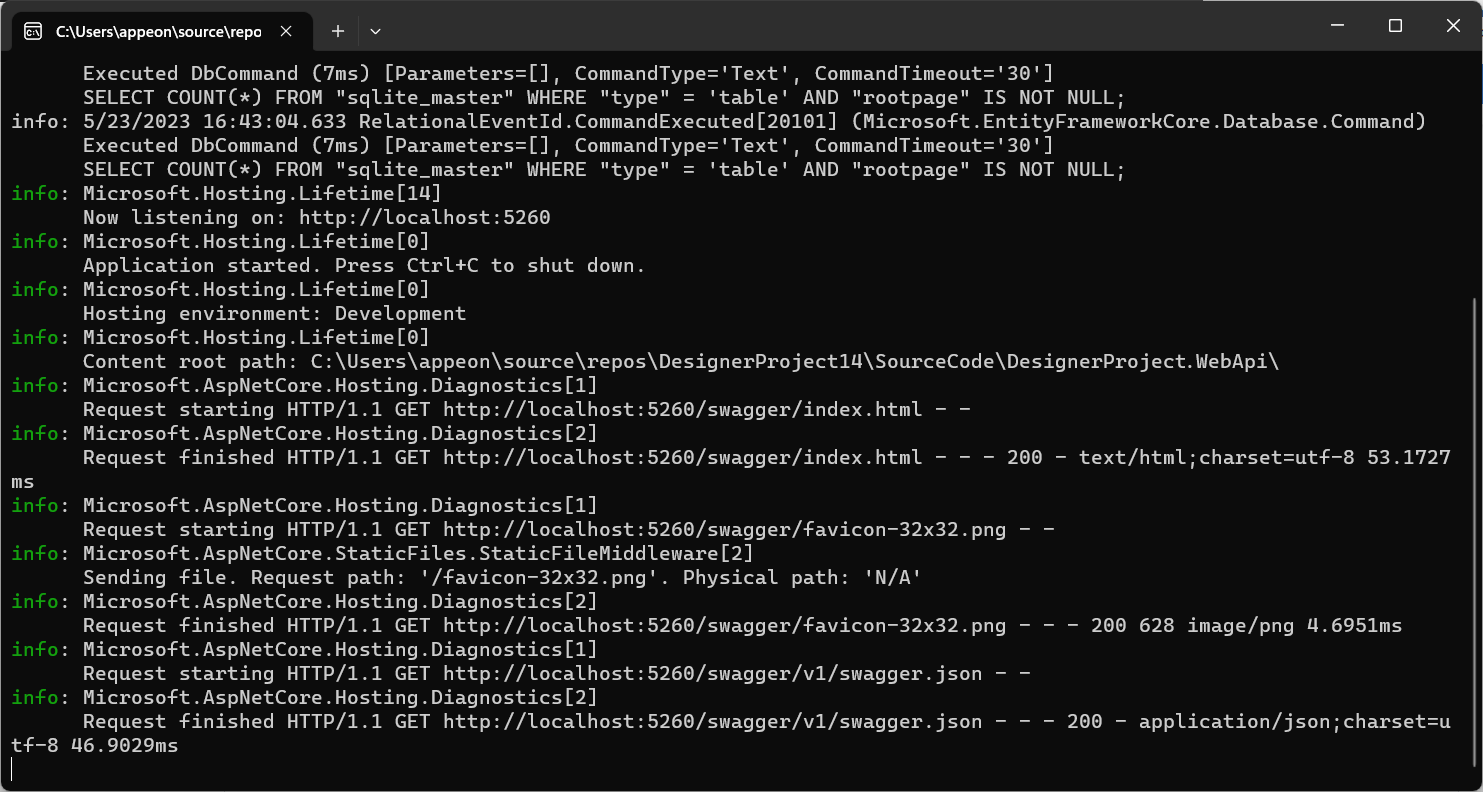
When Web APIs starts, the database file (data.db) will be generated automatically.
When the Web APIs runs successfully, you will be able to see the Swagger UI and test the basic APIs and the filter APIs on the Swagger UI.
For example, you can expand the Add API, and add data.
Creating an employee management demo
Introduction
This tutorial uses a demo application to explain how you develop applications using the visual designers in SnapDevelop. Please get the demo application from this link: https://github.com/snapdevelop/LowCode-WorkForceManager-Example.
Operations
This demo application generates the APIs for performing the following operations:
- Add, edit, delete, view companies
- Add, edit, delete, view departments
- Add, edit, delete, view employees
- Filter companies or employees
Overall design concepts
Entities
Creates a base entitie, BaseEntity, for holding fields that are re-used frequently.
BaseEntity: Contains the following frequently-used fields: id, Creator, CreateTime, Updator, UpdateTime.
Creates six standard entities: Employee, Department, Company, CompanyContact, Education, and EmployeeJob.
Relations
One company can have only one contactor, and one contactor can belong to only one company.

One company can have one or more departments, and one department must belong to and can only belong to one company.

One department can have one or more employees, and one employee must belong to and can only belong to one department.

Enums
- The CompanySize enumeration type is created and contains four fixed values: Tiny, Small, Big, Large.
- The Gender enumeration type is created and contains two fixed values: Female and Male.
- The DegreeType enumeration type is created and contains six fixed degree values.
- The EmployeeStatus enumeration type is created and contains four fixed values.
- The PositionType enumeration type is created and contains three fixed values: HR, MR, and Header.
Filters
Filter employees by department, and employee status. Two parameters are added: Department, and Status.
Employee.DepartmentId == Department
 && Employee.Status == Status
Development process
The following is a detailed step-by-step guide for developing the demo application.
Create a designer project
In SnapDevelop, select File > New > New project > Web API.
If you have downloaded the demo application, you may open it directly in the SnapDevelop.
Create and design the enumeration types
Right-click the project and select Add > New Item > Enum Design, to add the following enumerators: Gender, CompanySize, DegreeType, EmployeeStatus, and PositionType.
In the demo application, you may open Enums and see how they are designed.
Create and design the base entity
Right-click the project and select Add > New Item > Base Entity Design to add BaseEntity.
In the demo application, you may open Entities > Bases > BaseEntity.sde and see how they are designed.
BaseEntity entity
The BaseEntity entity is the base class for all other entities in this project. It contains the fields that are commonly used by the other entities, such as Id (primary key), CreateTime,UpdateTime.
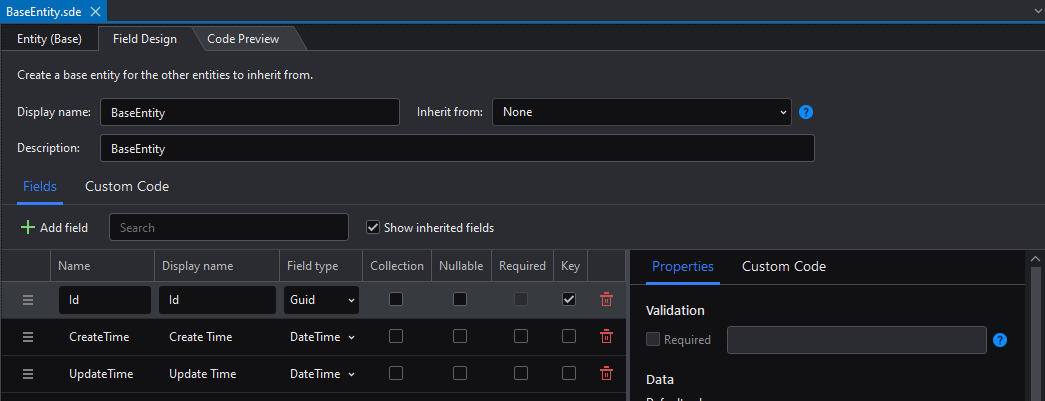
The following outlines the key steps to design the BaseEntity entity:
Step 1: Set the Id field as the primary key.
Step 2: Set the value for CreateTime to the current time using the UtcNow() expression and select Execute on insert option to execute the expression on insert.
Step 3: Set the value for UpdateTime to the current time using the UtcNow() expression and select both the Execute on insert and Execute on update options to execute the expression on insert and update.
Create and design the entities
Right-click the project and select Add > New Item > Entity Design (from Scratch) to add the following entities: Company, Department, Employee, CompanyContact, Education, and EmployeeJob.
The following outlines the key steps to design an entity by taking the Company entity as an example. For the other entities, please download the demo application, and open the Entities to view the entity settings.
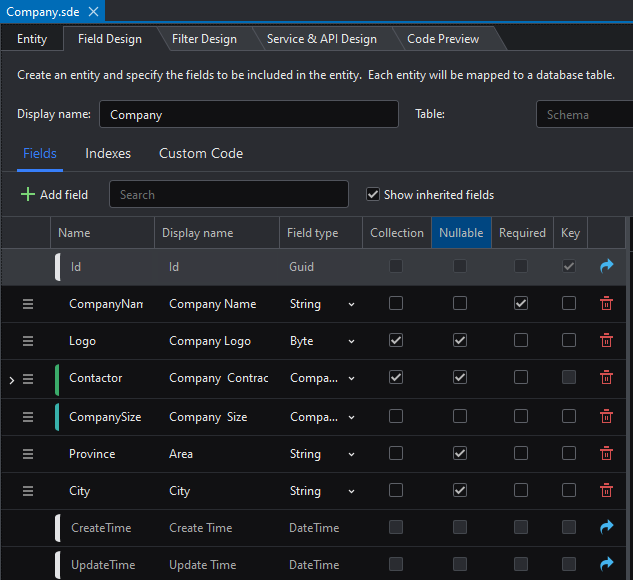
Field Design
Step 1: Set the Company entity to inherit from BaseEntity.
The fields of BaseEntity will be shown as readonly if the Show inherited fields option is checked.
Step 2: Set the CompanyName field as the required field, and specify the minimum and maximum length if necessary.
Step 3: Configure the Contactor field:
- Set the Contactor field to reference to the Employee entity and select the Nullable option.
- On the right panel, select One to One from the Relations list, select Employee from the Mapped to list, select Set null from the Delete rule list, and select the Generate foreign key field option.
Step 4: Set the field type for CompanySize to the CompanySize enumeration type.
Step 5: Add the Province and City fields.
Filter Design
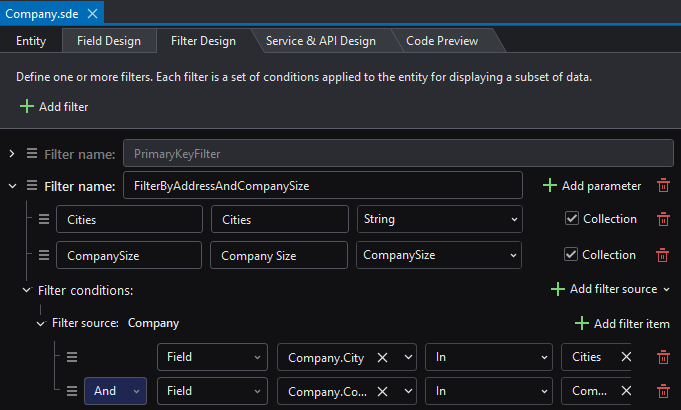
Step 1: Select the Filter Design tab, and create a filter named FilterByAddressAndCompanySize.
Service & API Design
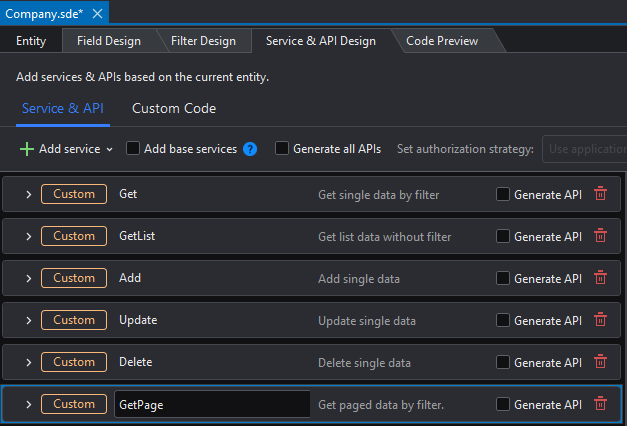
Step 1: Select Add service > Get single data > With PrimaryKeyFilter to create the service and change the service name to Get.
Step 2: Select Add service > Get list data > With NoFilter to create the service and change the service name to GetList.
Step 3: Select Add service > Get paged data > With FilterByAddressAndCompanySize to create the service and change the service name to GetPage.
Step 4: Select Add service > Add single data to create the Add service.
Step 5: Select Add service > Update single data to create the Update service.
Step 6: Select Add service > Delete single data to create the Delete service.
Step 7: Select Generate all APIs to automatically generate APIs for all these services.
Generate & run projects
Select Generate Projects: Profile from the IDE toolbar, or right click on the project node and then select Generate Projects > Profile.

After the projects are generated successfully, run the [project].WebApi project to start the Web APIs.
When the Web APIs runs successfully, you will be able to see the Swagger UI.
If you have enabled authorization, you will need to register an account, log in with the account to obtain the access token, click Authorize and enter the access token, before you can execute the Web APIs.
