Quick Start: Create a Web API Using EF Core Sidekick
Introduction
This tutorial will show how to use EF Core Sidekick to quickly reverse engineer models from a database and create services/Web APIs from them with only a couple of clicks, in contrast to the traditional process of doing this by hand.
Who's this guide for?
- Developers who already understand C# and EF Core fundamentals but want to streamline the Web API creation process.
- Those who want to avoid writing repetitive boilerplate code and accelerate database-driven API development.
- People who want to free up their minds from manually writing hundreds of lines of code and instead want to focus on the complex problem solving.
Prerequisites
- Fundamental knowledge about C#
- Fundamental knowledge about EF Core
- Visual Studio 2022
- SQL Server
- Microsoft's School Sample Database
Automating Web API development with EF Core Sidekick🚀
With EF Core Sidekick, we will be able to perform the previous procedure incredibly much faster and easier.
Project files
You can download the finished project files here to compare your process or if you run into any issues.
Architecture diagram
The following diagram represents the resulting architecture of EF Core Sidekick's generation process.

First, we need to install the plugin. Go to this page to download the extension. When the download completes, install it. After installing it, reopen the SchoolManagement project.
Creating a new project
Create an ASP.NET Core Web API project on Visual Studio:

Name it SchoolManagementSidekick and should have the following settings:

Generating entities automatically
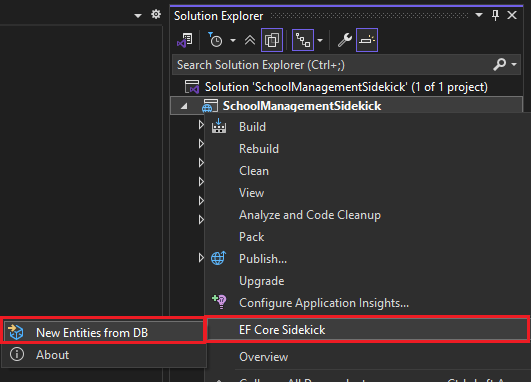
To begin using EF Core Sidekick, we will begin by creating models from our existing database. To do this, we right click on the project and go to EF Core Sidekick > New Entities from DB:
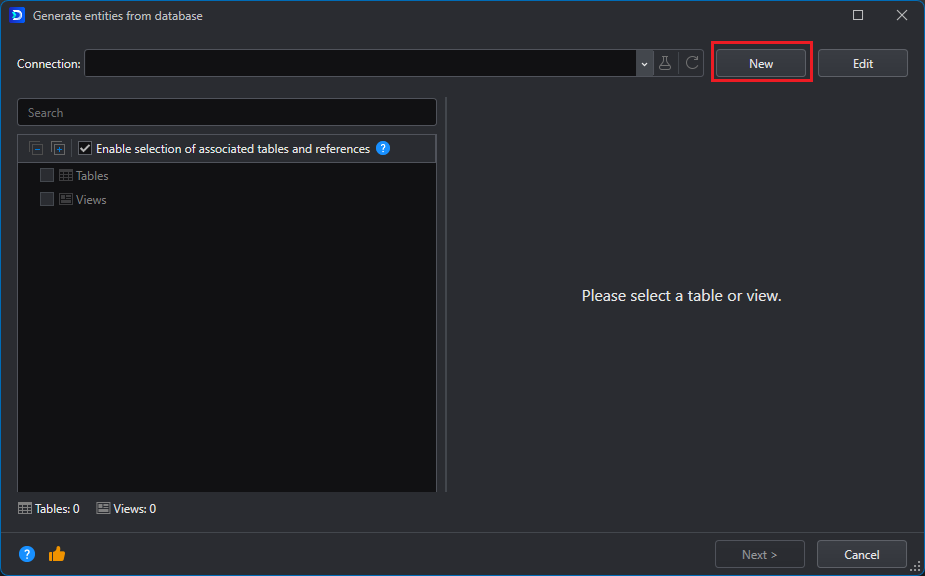
In the window that opens, we first need to configure the database connection that we'll be using. We create a new profile:
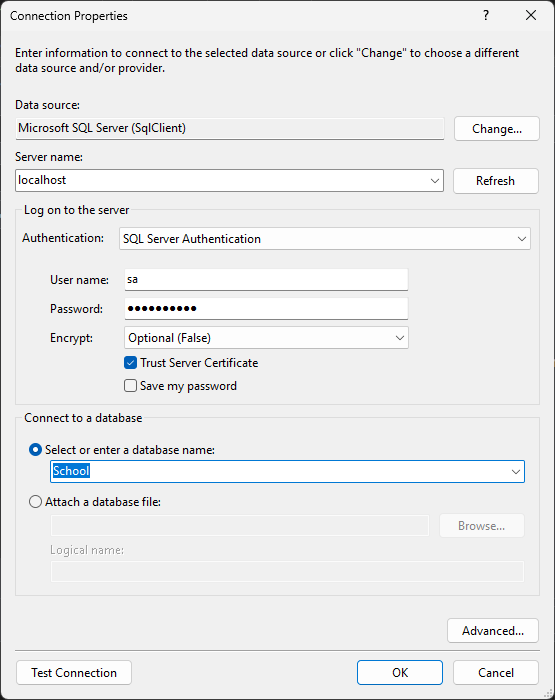
We configure the connection according to our database server, connecting to the School database:
If the connection is successful, we will be able to navigate through the database and select the objects we want to generate entities from:
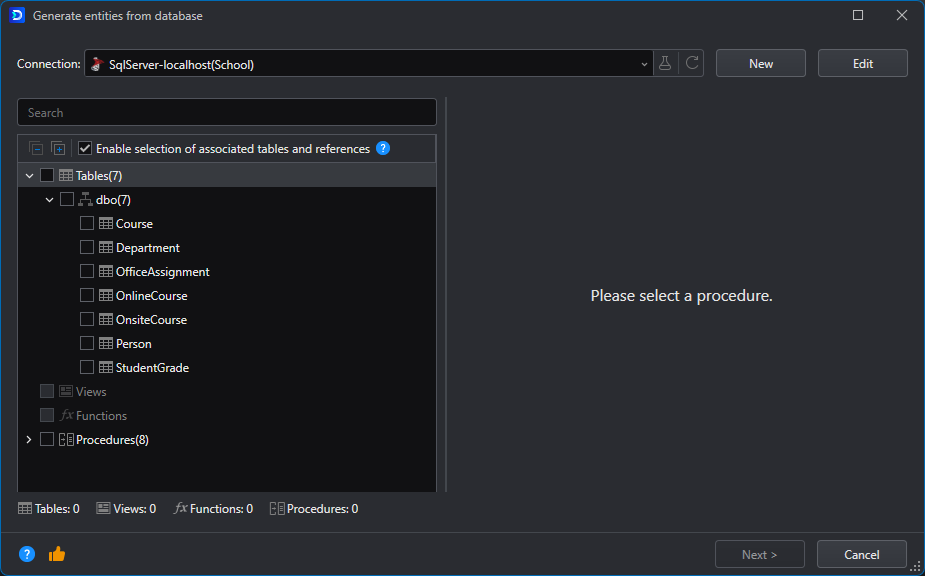
For our example, we will select only the Person table and then click Next.
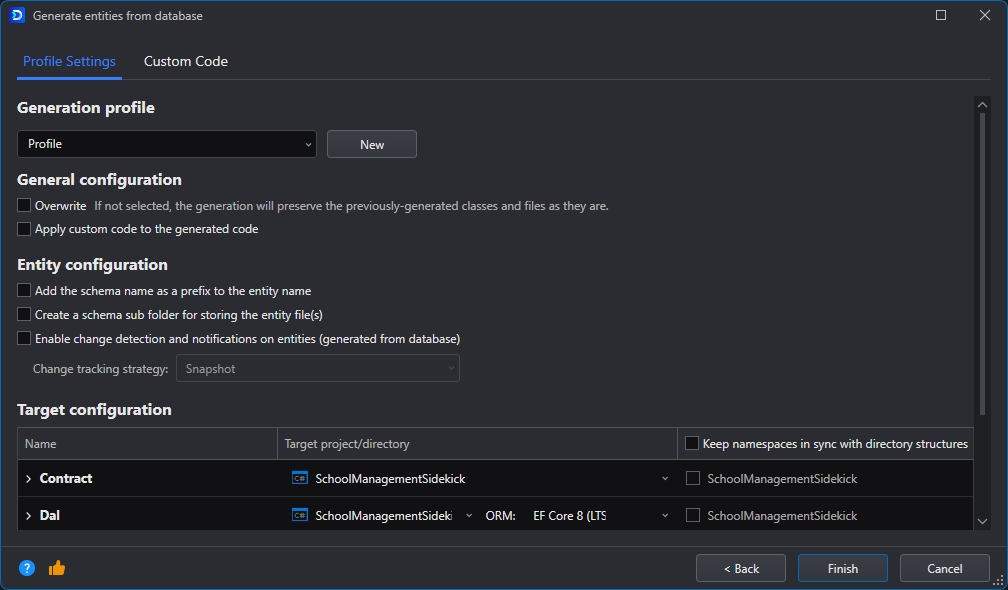
This screen can be left as it is. Click Finish.
A couple of folders were added to our project, they contain the models (Contract>Entities>Person.cs), the DataContext (Dal>DataContext.cs), and the class that configures the Person entities using EF Core (Dal>Configurations>PersonEntityTypeConfiguration.cs).

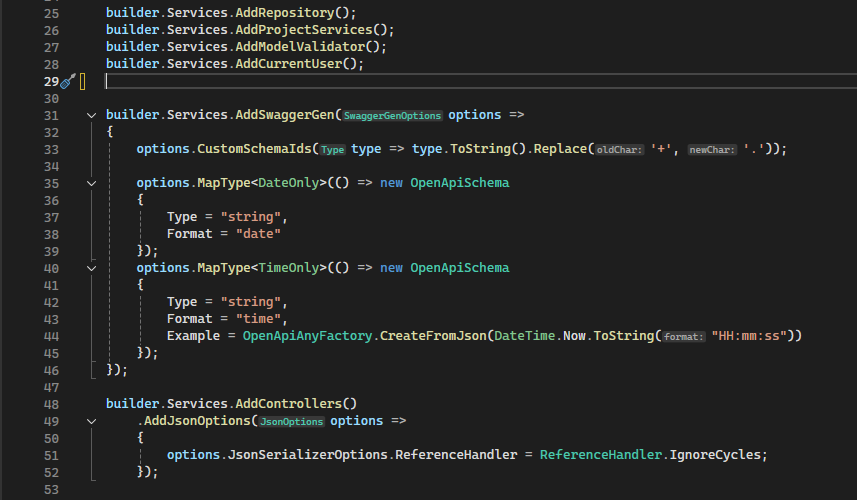
A screen indicating us to make some small modifications to our code shows up. As indicated, we will configure the DataContext for dependency injection by adding the following block before the builder.Build() statement on the Program.cs file:

Next, we will add the connection string to the appsettings.json file:
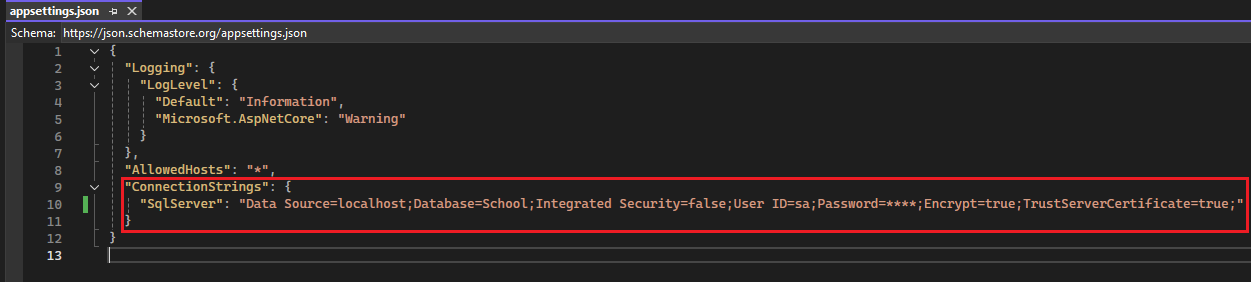
Note: it's not a good idea to store the connection string or other sensitive data in the source code. A better alternative would be to use the user-secrets vault.
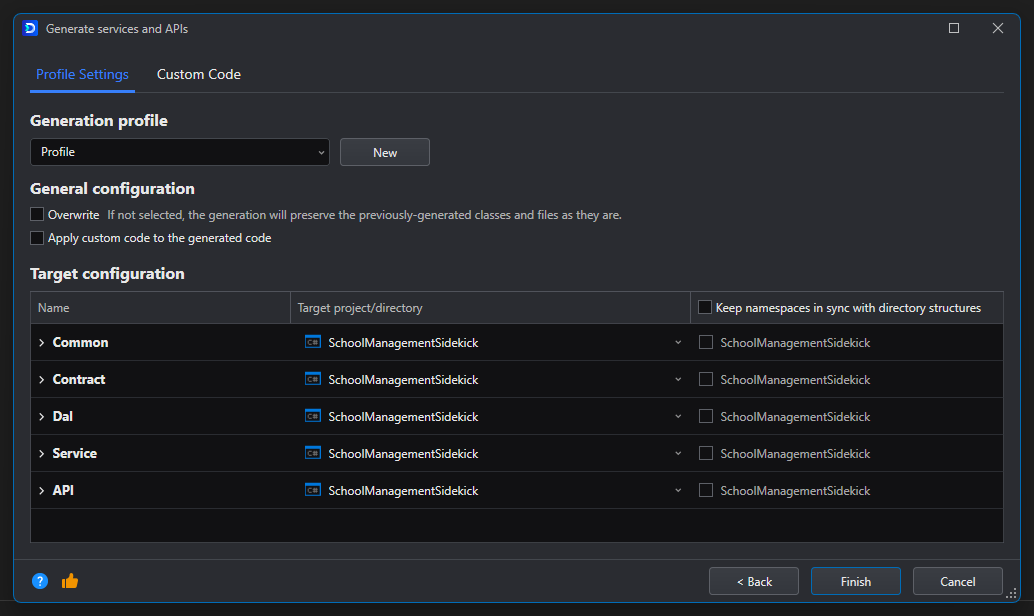
Generating the services and APIs automatically
To generate the service and controller that will respond to the incoming HTTP requests, right click on the Person entity we just created, and go to EF Core Sidekick > Generate services and APIs.

This will present the Generate services and APIs window in which you can configure several aspects of the scaffolding:
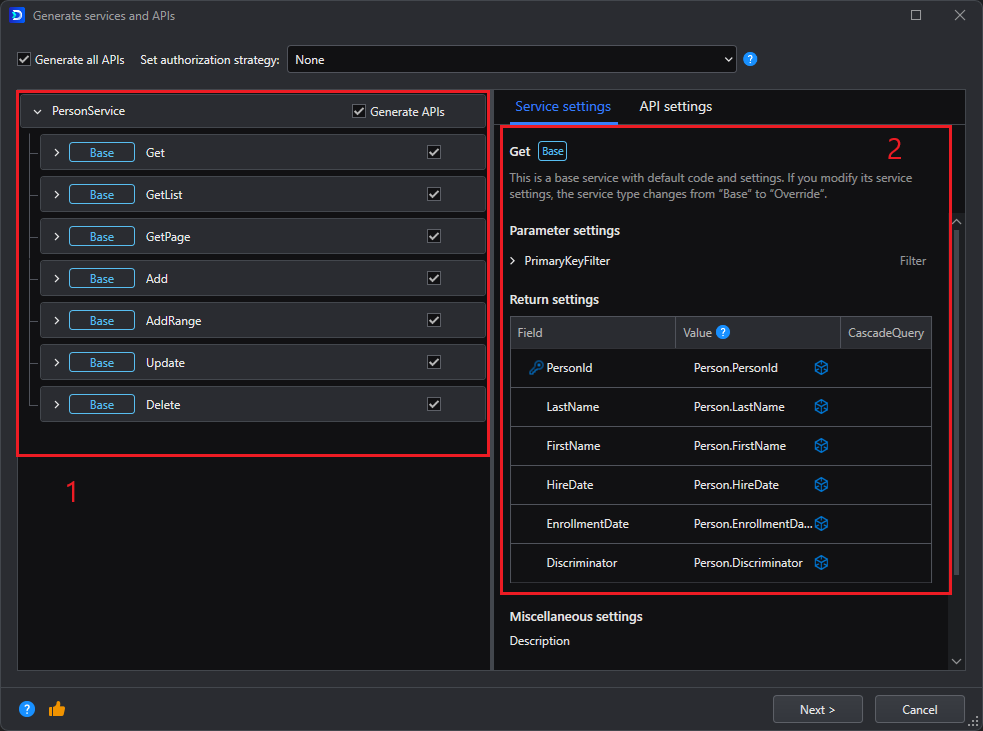
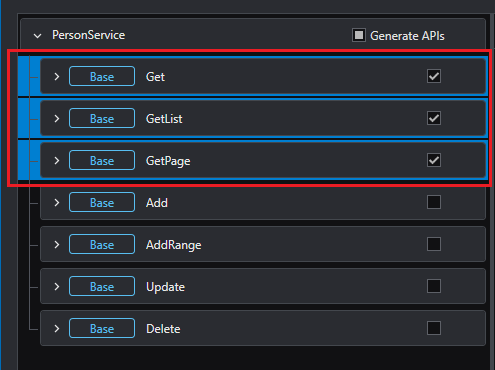
- Select which endpoints you wish to generate. If you want a read-only endpoint you can deselect the Update and Delete endpoints, for example.
- Service settings. In here you can configure the settings for each endpoint; for each of the return object's properties you can specify if its returned value will be obtained from the table's column, from a computed expression, of from a static value. If the value is a foreign key to an entity you have also imported and you want it to return the nested object instead of the foreign key, you can select it in the CascadeQuery field
On the API settings tab:
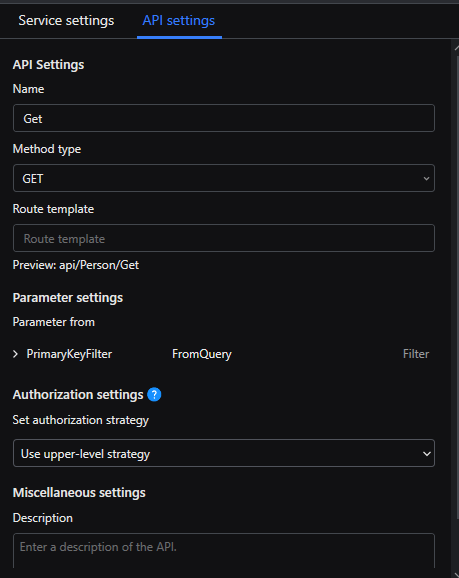
You can configure settings related to the endpoint itself, like its name, the HTTP method to use, if you want to specify a specific route for the endpoint, or if you want to set a specific authorization strategy for the endpoint.
For our example, we're going to select only the read-only endpoints and click Next.
On the overview screen, click Finish.
Injecting the service
Like indicated in the screen that appears, we'll add some lines to our Program.cs file before the builder.Build() line:
Running the generated Web APIs
Now with everything in place, we can run the Web APIs. We will see the following page pop up:

If we go to the /api/Person/GetList entry, click the Try it out button and then the Execute button we will see the results from the API query. And that's it, we now have a working ASP.NET Core Web API
Conclusion & Next Steps
Hopefully by this point you can see how quickly you can kick off Web API development by using EF Core Sidekick. The more tables and complexity your database has, the more significant the time savings with EF Core Sidekick. Not to mention that this tool does not limit what you can do, because once you generate the C# classes from the tables, you are able to make any modifications you see fit; or if you see yourself constantly regenerating the models you can add your custom code into the generation settings so that it's injected every time you run the process. .