Personalizing the SnapDevelop IDE
You can personalize your SnapDevelop IDE on Tools > Options.
Environment
In Environment, you can set the color theme for the user interface in the IDE, and configure a few options on how the IDE manages documents (files).
General
You can choose one of the following color themes: Light or Dark. The default theme is Dark. In the current SnapDevelop version, the supported language is English only.

Find and Replace
The Find and Replace setting provides the Display informational messages option for displaying all Find and Replace informational messages.

Projects and Solutions
Under Projects and Solutions, you can configure the option on how the IDE manages files, and define the file trees.
General
The General setting provides an option on prompting before moving files to a new location.

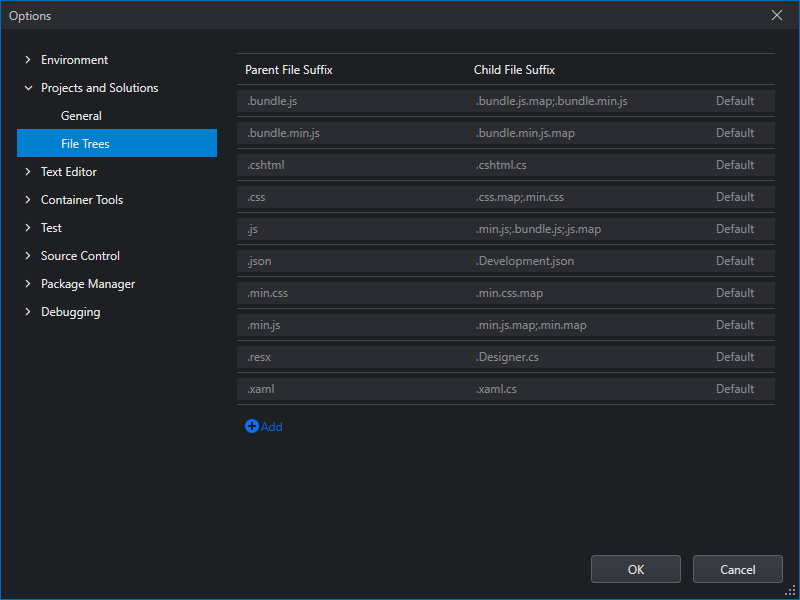
File Trees
There are a number of default file trees. Each file tree contains the settings on Parent File Suffix and Child File Suffix. As a result, the files with extensions from the "Child File Suffix" will be listed as sub items under the file with extensions from "Parent File Suffix" in the Solution Explorer. That makes it easier for you to view relevant files.
If necessary, you may add more file trees as you need.
Text Editor
In Text Editor, you can change global settings for the SnapDevelop code editor and customize the behaviors of the code editor.
General
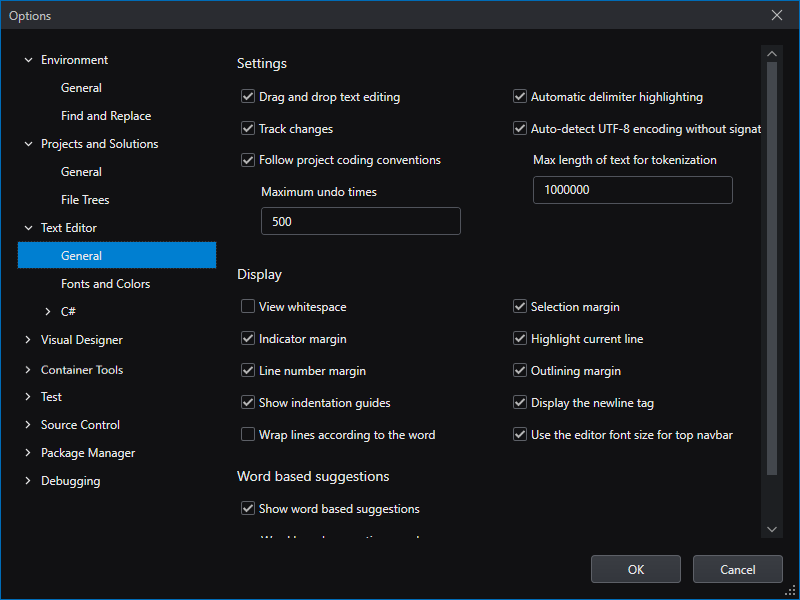
Under Text Editor > General, you can specify the various settings for the text editor and determine how the editor displays the code in it.
Settings
Drag and drop text editing
If you enable this option, you can move code to anywhere in the current file by selecting it and dragging it with the mouse.
Automatic delimiter highlighting
If you enable this option, delimiter characters which separate parameters, item-value pairs and matching braces, are highlighted.
Track changes
If you enable this option, a vertical yellow line appears in the left margin of the changed text to indicate that the text has changed since the file was last saved.
Auto-detect UTF-8 encoding without signature
If you enable this option, even if the file to be opened does not have a UTF-8 signature, the editor will automatically detect whether the file is a UTF-8 encoded file.
Follow project coding conventions
If you enable this option, when an Editor Config file exists in the directory structure, SnapDevelop will apply the editor settings in the file to the editor.
Max length of text for tokenization
The maximum text to be displayed when the editor provides language services.
Maximum undo times
The maximum undo times to be set in the editor.
Display
View whitespace
If you enable this option, spaces and tabs will be visualized.
Selection margin
If you enable this option, the IDE will display a vertical margin along the left edge of the editor's text area. You can click this margin to select an entire line of text, or click and drag to select consecutive lines of text.
Indicator margin
If you enable this option, a gray margin appears on the left side of the editor, and a breakpoint and other tool tips will appear when you click the margin.
Highlight current line
If you enable this option, a gray box appears around the line of code where the cursor is located.
Line number margin
If you enable this option, a line number appears next to each line of code.
Outlining Margin
If you enable this option, the outline appears next to each line of code.
Show indentation guides
If you enable this option, vertical lines will be shown on tabbed spaces.
Displays the new line tag
If you enable this option, new line tags will be displayed next to the right margin.
Wrap line according to the word
If you enable this option, line wrapping will not break the word.
Word based suggestions
Show word based suggestions
If you enable this option, when you type in the editor, the relevant word suggestions will show based on the typed text.
Word based suggestions mode
You can choose one of the following word based suggestions mode: Current document, Open documents or All documents.
Fonts and Colors
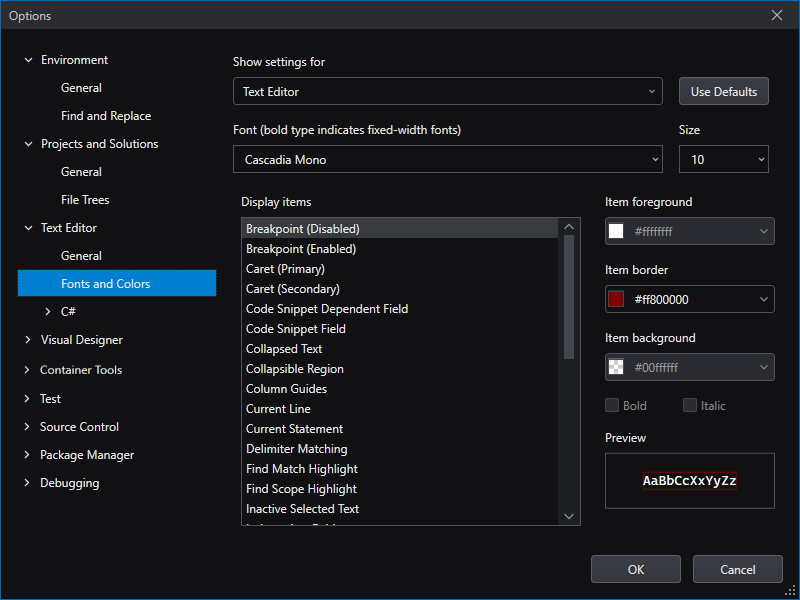
Under Fonts and Colors, you can set the font family and font size for the editor, and defines the colors of the display items. Note that besides configuring the settings here, while working in the editor, you can dynamically adjust the font size using Ctrl + Mouse wheel.
Show settings for
Select the editor for which you want to configure the font and color. If you want to restore the default settings, click Use Defaults.
Font and Size
Select the font type and size to use in the editor.
Display items/Item foreground/Item border/Item background/Preview
Various items make up the currently-selected editor. You can configure the way (foreground, background, etc.) to show each item. The Preview box will show the configuration result.
C*#*
General
Under C# > General, you can manage the ways the code editor behaves when you are writing C# code.
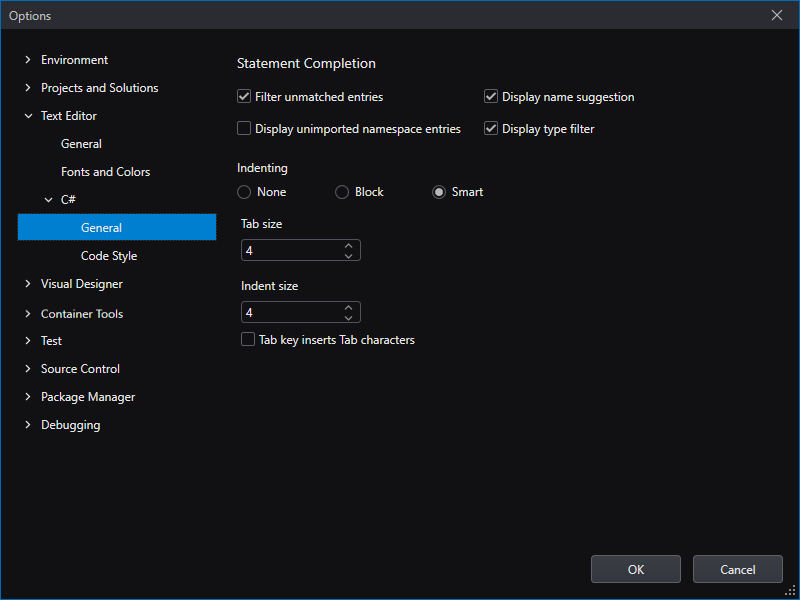
Statement completion
Filter unmatched entries
If you enable this option, the filter will be used to remove unmatched items from the list.
Display name suggestion
If you enable this option, automatic object name completion will be performed for the most recently selected member.
Display unimported namespace entries
If you enable this option, items from unimported namespaces will show their containing namespace as suffix.
Display type filter
If you enable this option, as you write code in the code editor, the editor will pop up lists of available values, members, properties, or methods, for you to select and insert into your code.
Indenting
None
If you enable this option, the new line will not be indented automatically. The insertion point will be placed at the first column of the new line.
Block
If you enable this option, the new line will be indented automatically. The insertion point is placed at the same starting point as the previous line.
Smart
If you enable this option, the starting position of the new line will be based on the development language, other code format settings and statement completion conventions to adapt to the code context
Tab size
Set the distance between tab stops (in spaces). The default is four spaces.
Indent size
Set the size of the auto-indent (in spaces). The default is four spaces. Tabs, space characters, or both may be inserted to fill the specified size.
Tab key inserts Tab characters
Whenever you press the Tab key, a Tab character is inserted.
Code Style
You can define and maintain a consistent code style on your development machine by defining .NET code style rule options here in Code Style. The code style settings apply to the coding stage, and for your machine.
If you prefer to apply the same code style to your whole team while they work on the same solution, or when building the solution, you shall create an .editorconfig file in the solution instead. The settings in the .editorconfig file would take precedence over the settings in Code Style.
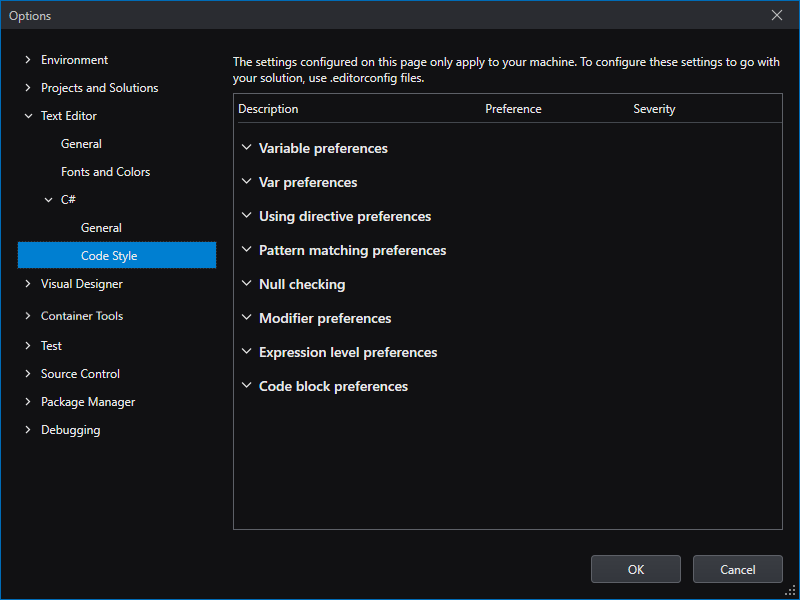
There are Preference and Severity settings for each code style:
Each code style may have different Preference options and can be set to the preference you'd like to have.
The Severity options include Refactoring Only, Suggestion, Warning, or Error.
In case that you code in the editor with a style that is not the chosen "preference" style, the editor will take action based on the relevant severity. Note that if you set the severity to Refactoring Only, you will not be able to receive Quick Actions while coding.
Visual Designer
General
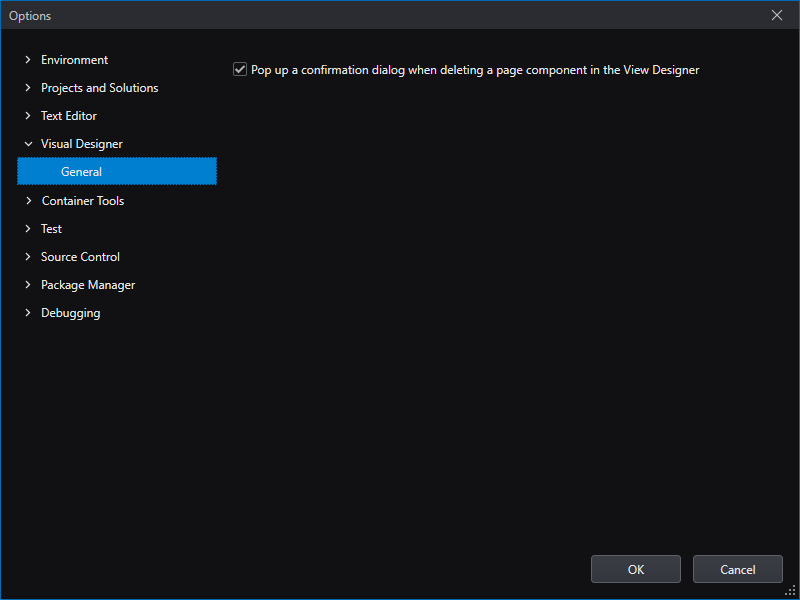
There is only one option in the Visual Designer setting: Pop up a confirmation dialog when deleting a page component in the View Designer. When disabled, no prompt will show up when you delete a page component from a view.
Container Tools
General
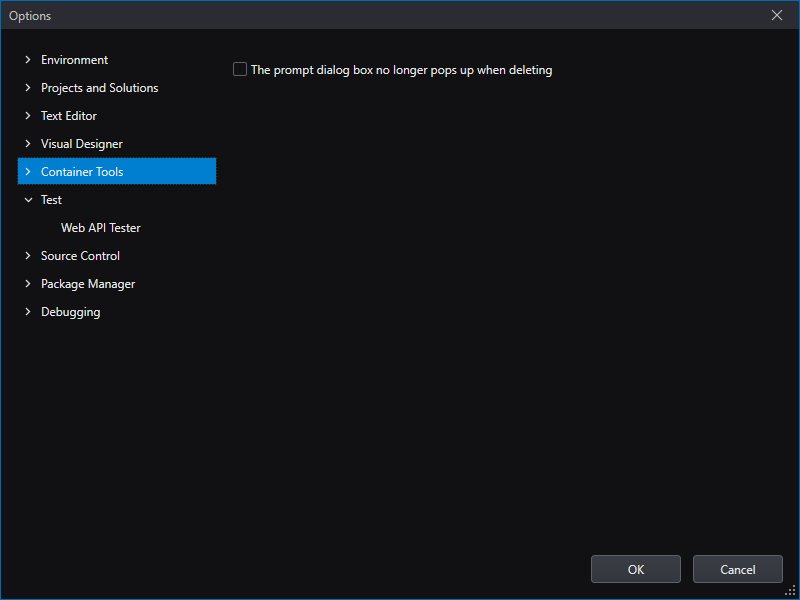
There is only one option in the Container Tools setting: The prompt dialog box no longer pops up when deleting. When enabled, no prompt will show up when you delete a container.
Test
Web API Tester
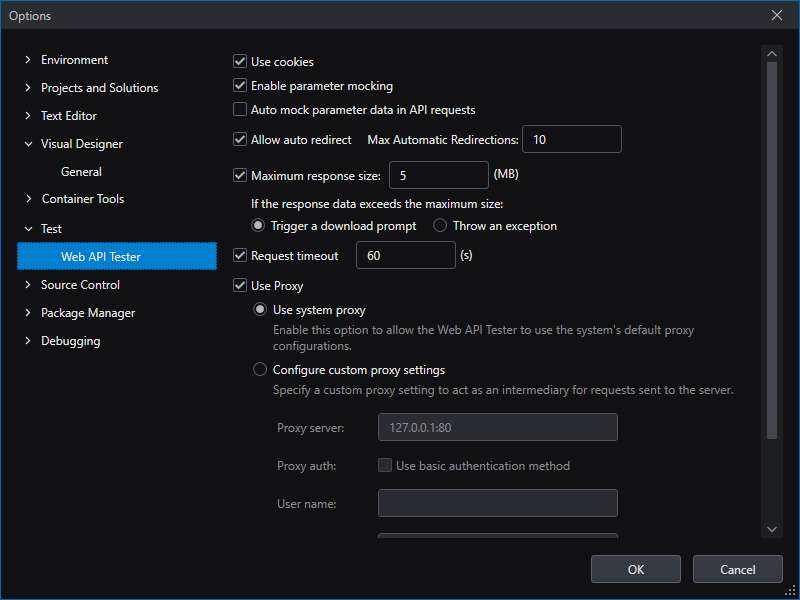
The following setting specify the global behavior of the Web API Tester.
Use Cookies -- Enables the use of cookies in the requests.
Enable parameter mocking -- Enables/disables the parameter mocking feature.
Auto mock parameter data when API is opened --Enables/disables auto-populating the default mocking values for the parameters in the Params tab.
Allow auto redirect -- Enables support for URLs that return redirects and allows to set up the maximum number of redirects allowed.
Maximum response size -- Determines the maximum response size to accept, and the action to perform when this size is exceeded.
Request timeout -- The maximum time, in seconds, to wait for a response from the endpoints.
Use Proxy -- Configures the use of proxy for the requests.
- Use system proxy -- Uses the system proxy settings.
- Configure global proxy settings -- Configures the global proxy settings.
Source Control
Two source control plug-ins, Subversion and Git, are provided when you install SnapDevelop.
Plug-in Selection
You may select the default plug-in to use for source control in the IDE: Subversion or Git. The prerequisite for using Subversion is that TortoiseSVN 1.10 or above is installed to your computer. You can also select None so that no source control plug-in will be used.

Git Global Settings
Specify global settings for Git, such as username, email, default repository location, etc.
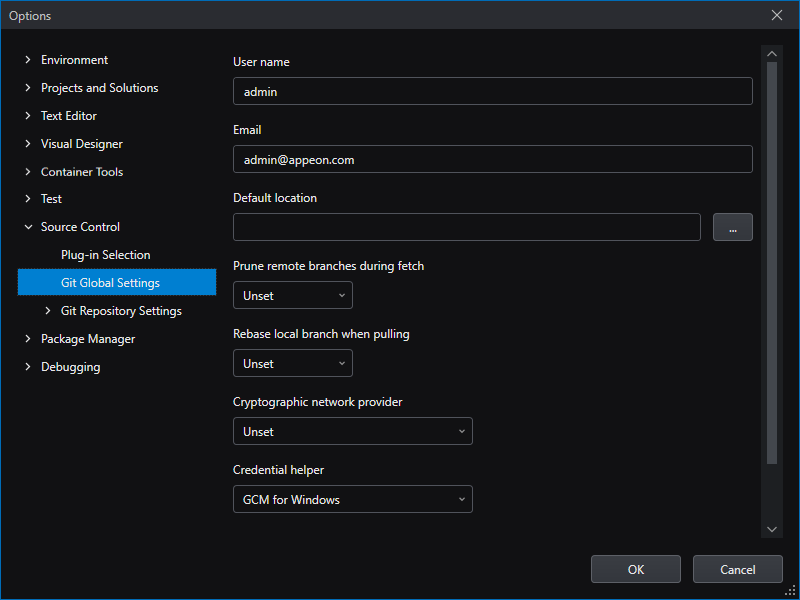
User name and Email -- These would be the user name and email to use when you commit to a Git repository from the IDE. They are identical with git config user.name and user.email.
Default location -- The default location where a cloned Git repository will go.
Prune remote branches during fetch -- When enabling the prune on every fetch, your local list of branches is always up-to-date with the remote. This setting is identical with git config fetch.prune.
Rebase local branch when pulling -- This setting deals with how to handle the local changes in the local branch when pulling in the published changes of the remote branch into the local branch.
- True -- Do a rebase to apply the unpublished local changes in the local branch on top of the published changes of the remote repository. No new commit is created in the rebase. This setting is identical with
git configpull.rebase. - False -- Merge the local changes to the remote changes. A merge commit is created to point to the latest local and remote commits.
- Unset (Default) -- Unless specified elsewhere, merge the local changes to the remote changes.
- Preserve -- Do a rebase to apply the unpublished local changes in the local branch on top of the published changes of the remote repository, but do not flatten the locally created merge commits.
Cryptographic network provider -- This setting specifies which TLS/SSL backend to use at runtime. It is identical withgit config credential.helper.
- OpenSSL -- Use OpenSSL. ( You can only connect to Github by using OpenSSL now. )
- Secure channel -- Use the native Windows solution Secure Channel (Schannel).
- Unset (Default) -- With this option, use OpenSSL.
Credential helper -- If the remote Git server requires credentials to be provided with each request, the credential helper is used to return the credentials needed. It is identical with git config http.sslBackend.
- GCM for Windows -- The helper is Git Credential Manager for Windows.
- GCM Core -- The helper is Git Credential Manager Core.
- Unset (Default) -- The helper is the one configured to use in the system config, which, by default, is Credential Manager Core.
Enable download of author images from 3rd party source -- If this option is enabled, the author image will be downloaded and displayed in the commit and history windows.
Commit changes after merge by default -- If this option is enabled, when you merge the current branch with another one, SnapDevelop Git will create a new commit. It is the same as running git merge with the --commit option.
Enable push argument (--force-with-lease) -- If this option is enabled, you can directly execute `push --force-with-lease in the IDE.
Git Repository Settings
The Git Repository Settings are only available if the current solution in the IDE is under Git source control. If the current solution is not under Git source control, you would only see the "No Git repository active" message when you click to open General or Remotes.
General
For the current active Git repositories, the settings in General will take precedence over the settings configured in Git Global Settings.
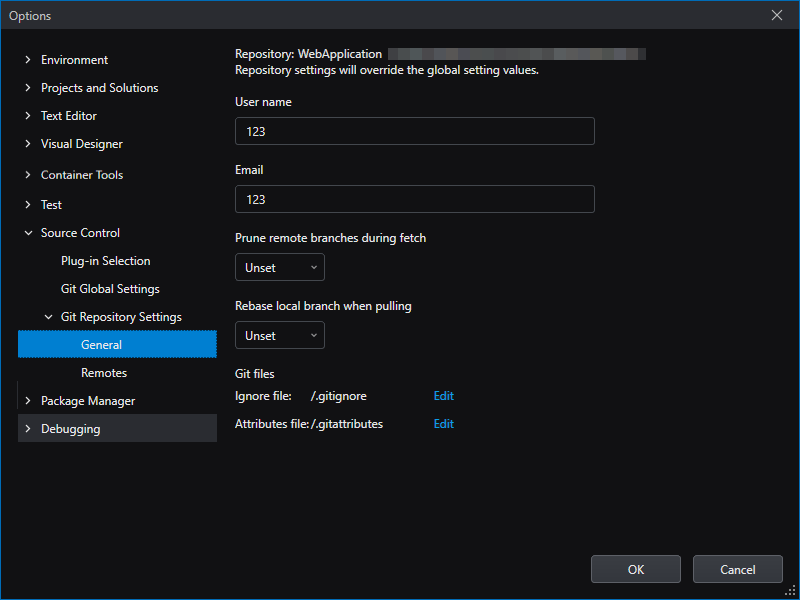
User name and Email -- These would be the user name and email to use when you commit to a Git repository from the IDE. They are identical with git config user.name and user.email.
Prune remote branches during fetch -- When enabling the prune on every fetch, your local list of branches is always up-to-date with the remote. This setting is identical with git config fetch.prune.
Rebase local branch when pulling -- This setting deals with how to handle the local changes in the local branch when pulling in the published changes of the remote branch into the local branch.
- True -- Do a rebase to apply the unpublished local changes in the local branch on top of the published changes of the remote repository. No new commit is created in the rebase. This setting is identical with
git configpull.rebase. - False -- Merge the local changes to the remote changes. A merge commit is created to point to the latest local and remote commits.
- Unset (Default) -- Unless specified elsewhere, merge the local changes to the remote changes.
- Preserve -- Do a rebase to apply the unpublished local changes in the local branch on top of the published changes of the remote repository, but do not flatten the locally created merge commits.
Git files - Ignore/Attributes -- If you click the Edit link beside the Ignore or Attributes file, the .gitignore or .gitattributes file in the current solution would open in the editor and then you can edit it.
Remotes
Remotes shows the list of remote repositories for the current solution.
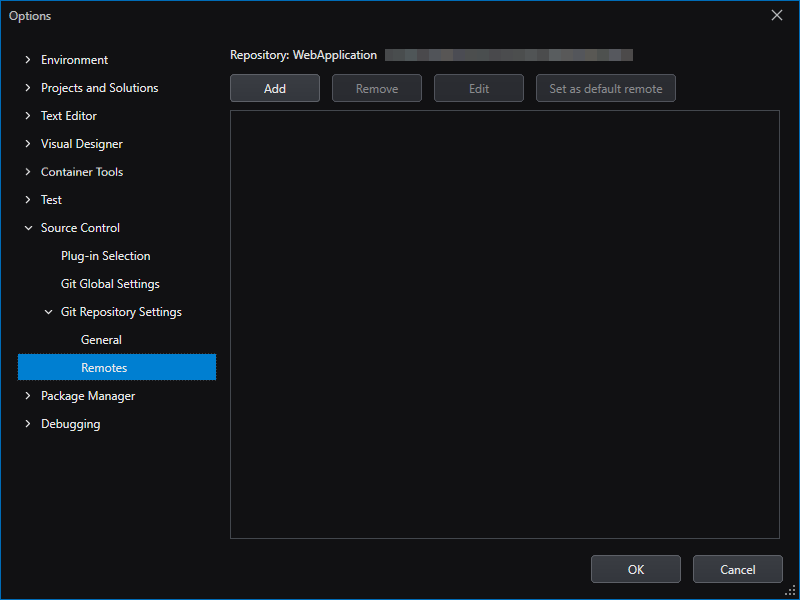
You can add, edit or remove remote repositories. It is possible to set multiple repositories. If there are multiple ones, you may set one of them as the default remote.
Package Manager
NuGet Package Manager
In NuGet Package Manager, you specify how the NuGet Package Manager downloads and manages NuGet packages.
General
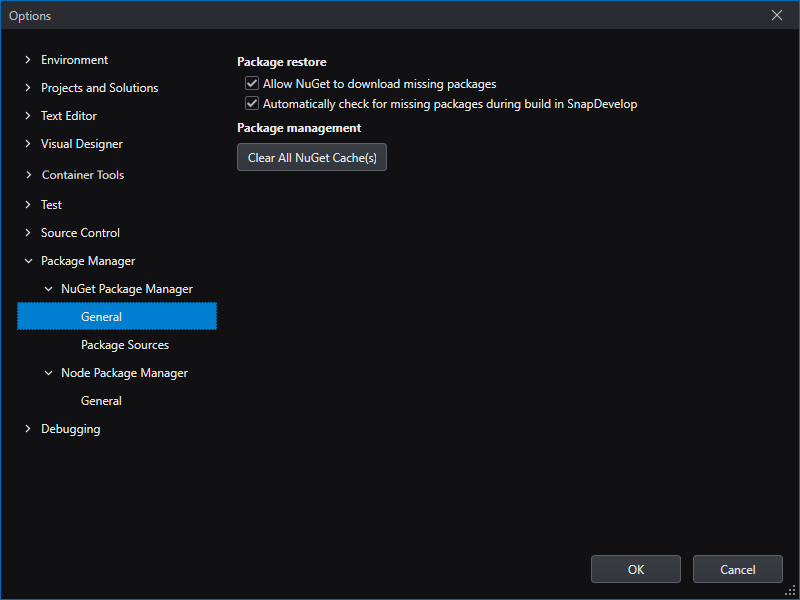
Under NuGet Package Manager > General, you can configure the general NuGet package management settings.
Allow NuGet to download missing packages
If you enable this option, SnapDevelop would first try to retrieve, from the cache, the NuGet packages referenced in a project. If the packages are not available in the cache, NuGet then attempts to download the packages from all enabled sources. If you enable this option, missing packages are automatically restored when you build a project in SnapDevelop.
Automatically check for missing packages during build in SnapDevelop
This option controls whether SnapDevelop automatically checks for missing packages when you build a project in SnapDevelop.
Clear all NuGet cache(s)
You can choose to clear all NuGet caches on your computer so as to prevent yourself from using the old or obsolete packages and help your apps run better on your machine.
Package sources
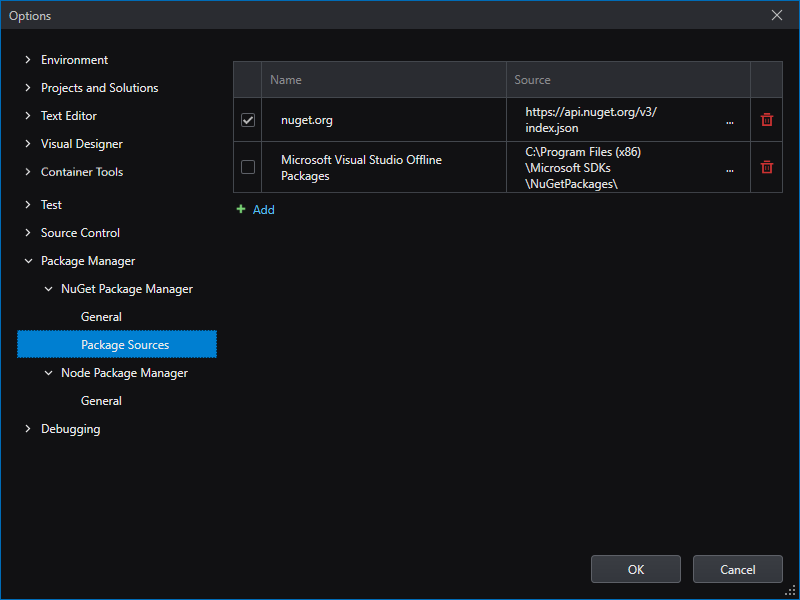
This option allows you to teach NuGet Package Manager where to find packages to download. You can have multiple package sources.
The available package sources are custom package sources. In SnapDevelop, you can add multiple package sources to this list for NuGet Package Manager.
Step 1: To add a source, click the Add button at the bottom of the table, the added source will appear in table, then modify the name and the URL of the package source.

Step 2: To change a package source, click on the text field of the name or URL you would like to modify, then reedit its name or URL.
Step 3: To disable a package source, clear the box to the left of the package name in the table.

Step 4: To remove a package source, click the trash icon to the right of the package source you want to remove.

The order of the package sources in the table does not set the request priority. SnapDevelop uses the package that is first to respond to requests, regardless of the order of the package sources.
Node Package Manager
General
In Node Package Manager, you specify how the Node Package Manager downloads and manages node packages.
How to install dependencies -- Configure the installation mode of dependencies.
- Default -- Only search for dependencies in configured locations.
- Offline -- Will only try to search the local cache for the dependencies. If no package is found, the installation will fail.
- Prefer Offline -- Cached data will be used first. If there is no matching cached data, the installation will download from the remote repository.
- Prefer Online -- Download from the network and ignore the cached data. With this mode, the latest dependencies will be installed.
Auto-install dependency -- If the project does not have a node_modules folder, it means that the dependent packages are not installed. In this case, the project dependencies will be automatically installed.
Skipping dependency conflicts -- Add --legacy-peer-deps parameter to help with dependency installation with conflicting peer dependencies.
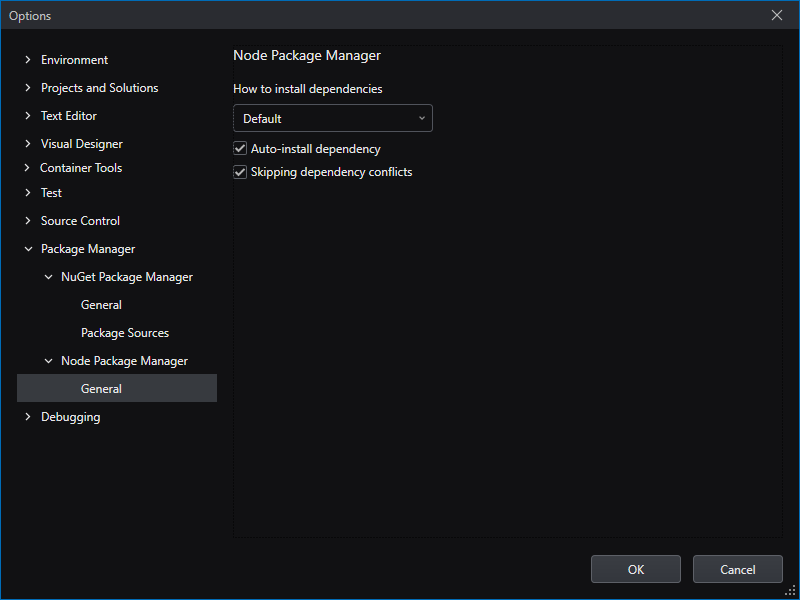
For more information on peer dependencies and the --legacy-peer-deps switch, check out https://nodejs.org/es/blog/npm/peer-dependencies/ and https://docs.npmjs.com/cli/v7/using-npm/config#legacy-peer-deps.
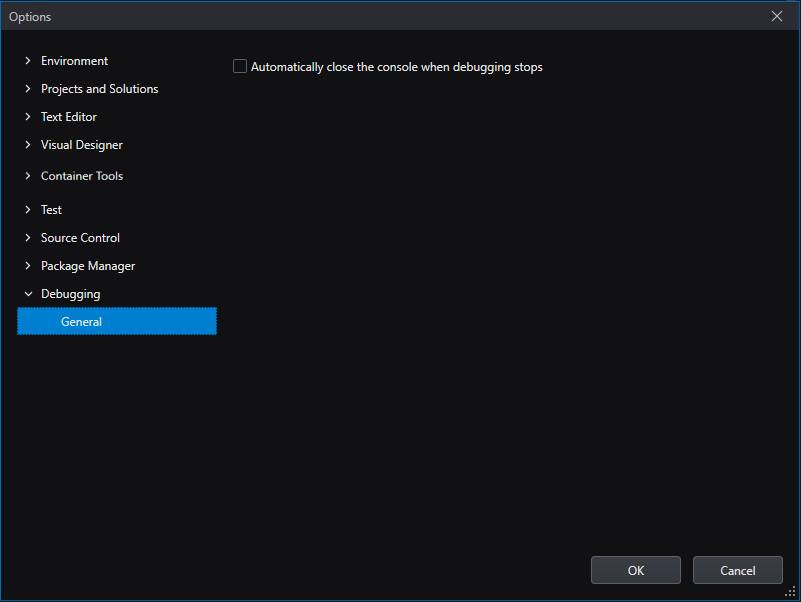
Debugging
General
There is only one option in the Debugging settings: Automatically close the console when debugging stops. By default, the option is unchecked, so that it is more convenient for you to check exceptions in the console. If you check the option, the console will automatically close.
